A Quick Ferment Guide

Have had several people now asking how to get started in fermenting all of the beans and pickles or all the veggies you can find this time of year.

Its just too easy not to do it. You basically need two things. 

JARS–Get a couple quart mason jars with rings and lids. (Pints are just a bit small, save the bigger half gallons for later) Even the bigger pickle jars will work.
SALT–Kosher or pickling salt. None of the iodized stuff. (Mortons Canning and Pickling Salt)
WATER–Tap water is fine but try to use non-chlorinated.
Thats it!
———————————————–

What we are trying to do is simple. Cover the veggies with a salt water solution to stave off any weird yeasts or bacteria long enough for the GOOD bacteria..Lactobacillus, to take over and start fermenting.

The easiest way to get started is to grab a bag of green beans, carrots, peppers, cukes or like for this.. Radishes
Slice or chop your veggies into smaller pieces 
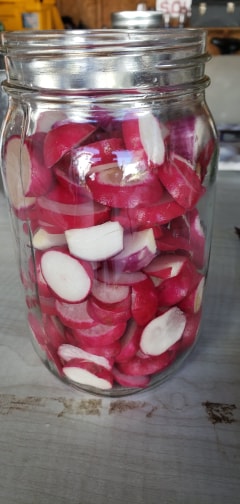
Pack them fairly tight and up to the neck of jar.
If you have spices, add them now.
pour in your brine (will show this below) and fill the jars up over the veggies but leaving a bit of space from the top.

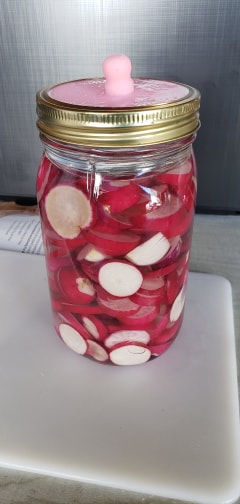
Put your lid on but not so tight,, if you have airlocks (Also see below) then use those now.

Set in a warm place. A week is good, 2 weeks might be better. (If you do not have airlocks, crack open the lids every other day to let the pressure off.)
Thats it!
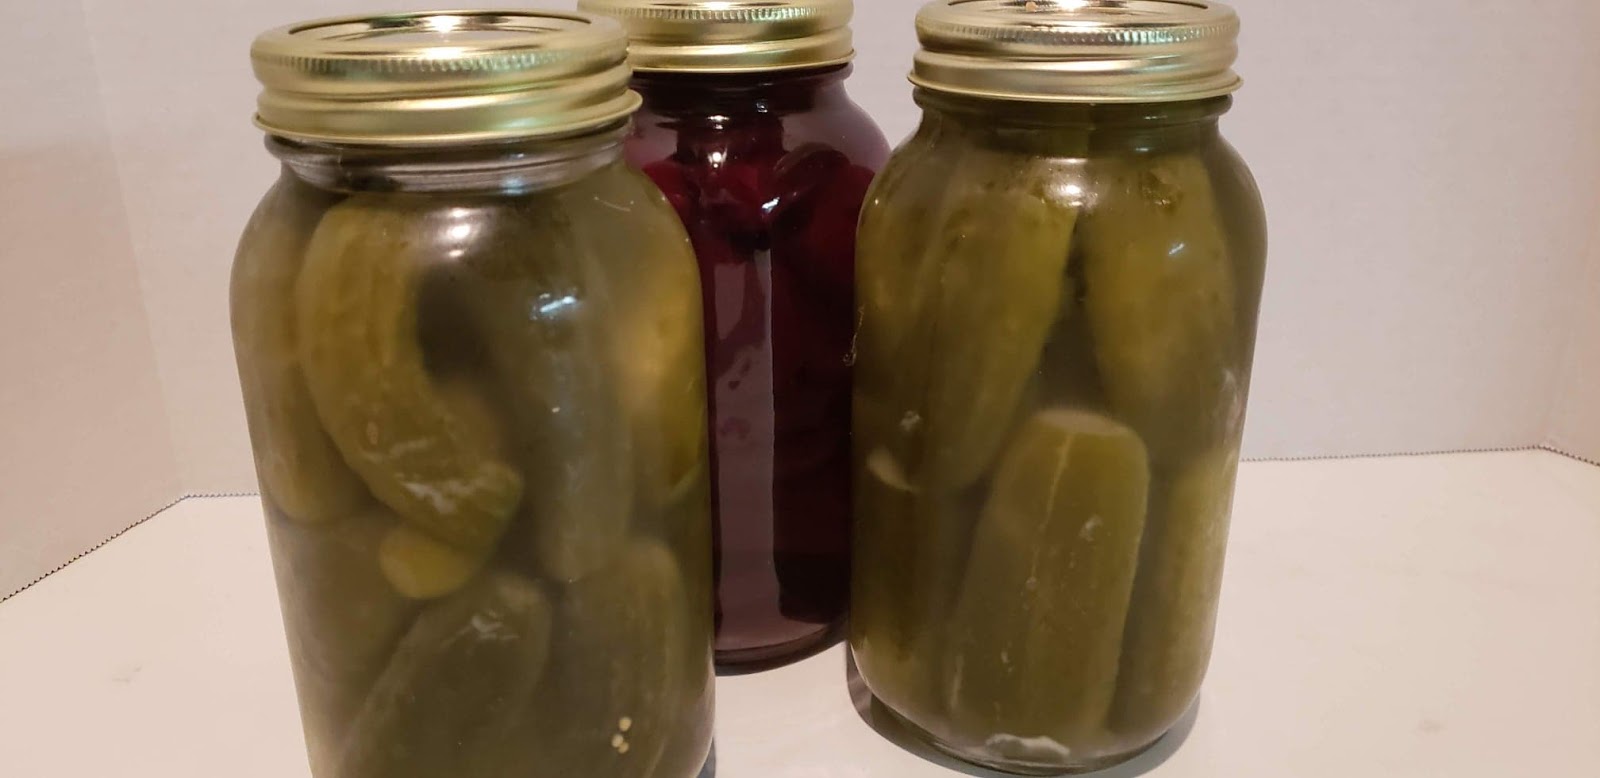
Eat. and just store the rest in the jar in the fridge.


Now,, what exactly is this Brine? 
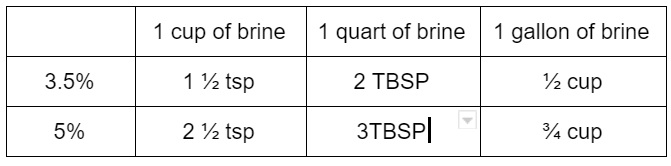
Just the salt water solution you pour over the veggies. What we are looking for is somewhere between a 3% and 5% salt solution. (3.5% is my usual because of the easy measures)
Sounds technical, but nope. Use the chart below to figure how much salt for the amount of brine your making. Just stir it up and its done.

 Tips:
Try to pack tight enough that the food stays under the brine level. 

Some white film may form on top… DON’T WORRY,, that’s just the natural yeasts from the veggies. If you do get some, just spoon it off the top and add more brine if you need to.

Experiment with more/less spices or veggie mixes.. Share with friends 


Some helpful things to use.
Airlocks
You can buy lids with a hole for a brewing airlock,, or the new silicon lids. These are great because you don’t need to burp jars.
Jar weights
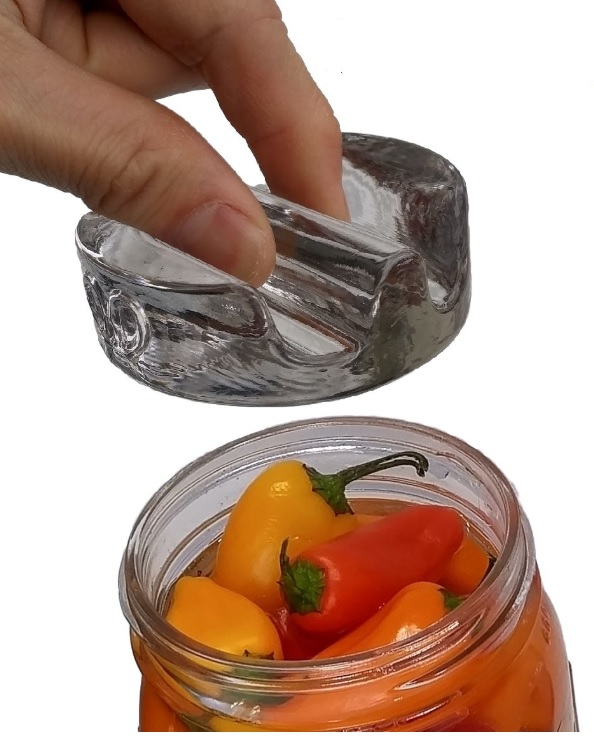
Just a round piece of glass or stone that fit inside the jars to keep the food under the liquid. Mostly for wide mouth jars.
————————————————
You can get more technical and involved, but using this quick guide will get you started so you can ferment any veggie out there. 


(kraut is slightly different, but same idea. I will make a quick guide for that later)

Red, ESB, and Wheat

Doing a quick catch up here on things while we are “emptying” a few kegs for summer use.

Proud to say that the Beet Saison did in fact win the Copper State Wort Challenge. Besides being a damn good Saison, it looks great and is very easy to make.. and that’s what probably was the deciding factor.

Next up.. a few brew days. Had a dual Mash and Boil brew with Maxwell back in March. We did some Irish Reds.

I actually was not very impressed with mine. I left it to ferment down at the store. It was on the floor against the outside wall. So it was probably fluctuating between high to low 50s. Not so detrimental, but will most likely take a bit extra for it to come around as they say. Its now awaiting it place in the fridge rotation.

20190407_124241.jpg

A few weeks ago I won a bunch of grains from the Bull Falls Golden Growler contest. Some Golden Promise and something called Stout Malt. Presumably a Maris Otter-like malt?

Used the Golden Promise and brewed up the Hobgoblin clone that I brewed back 2012. That beer was beyond fantastic. Still in primary, but hoping to get it kegged up within the next week. (Soon as I can finish off a keg)

And this past Saturday I did a quick and usually easy American Wheat with Amarillo hops. I say usually because I decided to use Beersmith instead of my own calculations and ended up with some wonky water volumes. Some of it my fault, some of it not. But nothing too detrimental. Should be a good beer that’s still fermenting well right now.

And the rest of my week will be getting the TTO beers labled and ready for drop off. I don’t have as many entries as usual, but the ones I do have are pretty good.

Next up, I will be doing something with that stout malt.

Pickles!

Its that time of year when the cukes start overtaking the farmers markets. Still a lot of the smaller ones, so lets make some pickles.

20180711_203726.jpg

About all the equipment you need to make a batch of pickles is a bucket and some jars. Not much for ingredients either, especially if you ferment them like I am for this first batch of the year. If you are looking for Vinegar based pickles, here are my IPA Pickles

All I’m using today is:

20180712_160658.jpg

  •  Small pickle cukes. (As little or as many as you want)
  • Kosher or pickling salt, (don’t use iodized salt)
  • garlic cloves
  • dill seed, mustard seed, black pepper corns
  • a bayleaf
  • fresh dill flowers (this optional as the dill seed is just fine)

First thing you wanna do is clean the cukes of course. Then let them cold in some cold ice water for an hour or so. This help to keep them crisper.

After the soak go ahead and cut of the tips of the cukes.

20180712_202137.jpg

Next get put all your other things in your fermentation crock or bucket. Here I used 5 cut up garlic cloves, some fresh dill sprigs, one bay leaf, and 1 tsp each of the mustard seed, dill seed and peppercorns. 20180712_202033.jpg

Mix up your brine. 1 gallon of filtered water and 3/4 of the kosher salt. 20180712_202933.jpg

Put your cukes the bucket and add enough of your brine to completely cover them.20180712_203157.jpg

Use a plate to keep the cukes under the brine.20180712_203142.jpg

And that’s it. Either cover the bucket with a towel or put a airlock on like I did and put it in a warm place to let it ferment.20180712_203529.jpg

After a week or so, take a test taste to see if they are sour enough. If not then let them go another day or so. Once they get where you want them pack them up in jars with the brine and put them in the fridge. (Unless you can them, they gotta stay in the fridge)

That’s its it! Start your pickles now and will be ready just in time to get your crocks back for Kraut!


PS: for those wanting to can these for storage this is easy too.

get your jars ready for normal canning. drain, strain and keep the liquid. pack your jars tight with the pickles. boil the liquid for a minute or two and pour into the jars leaving a 1/2 headspace. waterbath for 10 min pints, 15 quarts.