My Kviek Uses

Seems like out of nowhere Kviek yeast blasted onto the radar of homebrewers and now craftbrewers. Its the Norwegian Farmhouse yeast that has crazy temperature tolerances.


Brewers were claiming it to be producing clean ales and even “lagers” at temps reaching into the 90sF or even higher! And being done in as little as two days.

Sounds almost too good to be true. But the reports kept coming. So I finally gave it a few tries. My garage would be the perfect place to let it rip at 90 degrees. 

The best way to test new ingredients is of course to keep them as simple as possible, so a SmaSh beer (Single Malt and Single Hop) fits perfectly. I went with Munich malt, Magnum hops, and Hornindal Kviek.
This was August. Middle of summer. My garage, and everything else is in the 90s now. I get the beer brewed and the liquid Kviek pitched. Just have to wait for the “explosion” that’s supposed to happen.

Fizzle… Nadda. First day there was nothing. You could just see the yeast clump laying on the bottom of the carboy. Just as I had figured this was gonna work. I’ll just let it sit just to make sure. 

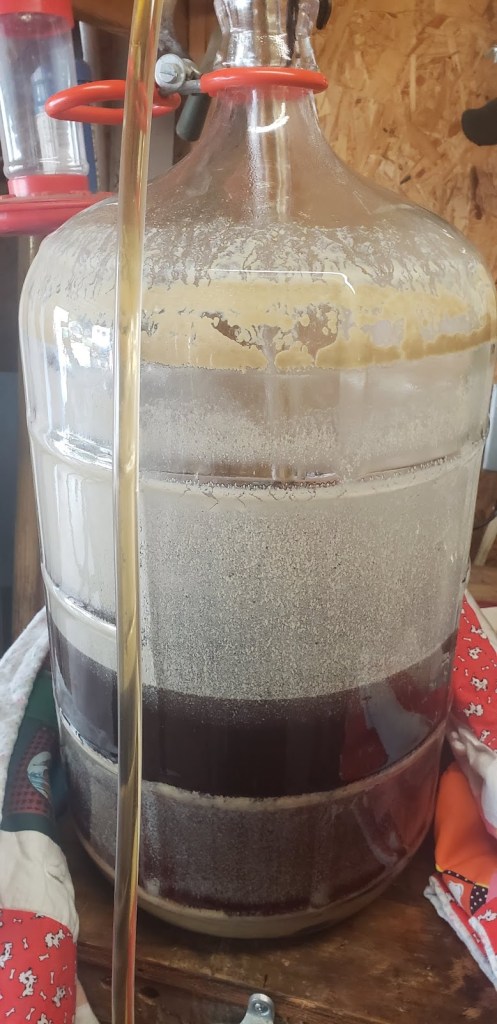
Day two was a completely different story. Nearly up and out of the 6.5 gallon carboy, and churning so hard the bench was rumbling. And then by day 3 it was nearly completely stopped. Day 4 everything dropped and halfway done clearing. Well,, as clear as Kviek gets. (More on that shortly)

Tasting notes from the first batch were just as people said it would be. Fruity and bright. No off flavors like you would expect from high temp ferment. But murky. Like a mud bomb went off in the carboy. And that yeast taste hung around in the keg for quite a while. But when it finally dropped it was very clean tasting. But never quite clear.

The second batch was Voss Kviek. Again a SmaSh, Munich, saaz, Voss. Again in the 90s
Pretty much right down the same stages as the Hornindal. A day of lag, then a day of violent ferment, then everything falls out and starts to clear by day 3. 

Same results. Fruity, but a different fruity this time. More like fruit salad, but bright. And again muddy looking. And still yeasty tasting until the keg drops clear.. or clearer. It don’t really become clear. Not as hazy as a New England, but close.

One thing to note is that this yeast makes a ton of sludge. There must be two inches of yeast at the bottom. And seeing that, I wanted to try and save some. And I did what I read the farmers did to save this yeast. Dry it.


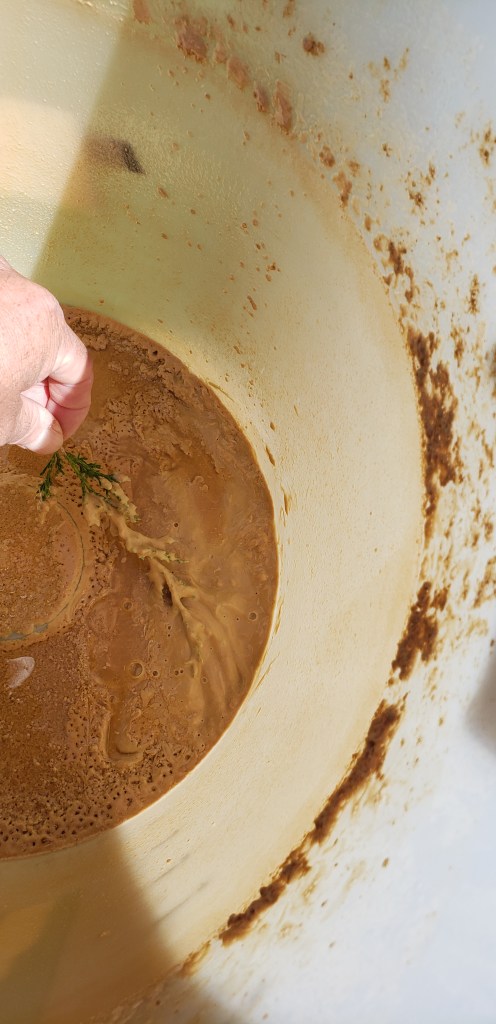
I grabbed a spruce branch right off the tree and swabbed it in the yeast cake and hung it in the garage. At 90F and a ceiling fan, it dried very quickly.

The next batch I made the beer as normal, and just took this stick of dried yeast, which you can see is pretty small. Like 3 inches or so. And chucked in into the wort. 

This time we had activity going much sooner than pitching the liquid. But it did the same crazy ferment and drop as the other had.
Still dirty. But I’d say not as bad. But still it never really clears in the keg. Same tastes same aromas. 

Come to find out that alot of people are getting better ferments by really under pitching. Using ¼ packet. Seems to help with the lag and esters.

And drying the cake is really popular for saving this yeast. Spread it in a pan, let it dry, break into pieces, freeze till needed, then just pitch a few dry hunks.

This yeast has some good qualities to it for sure. Some might not like that its never clear, I don’t mind. And there are more and more varieties out almost weekly. 
There are many experiments that need to be done with these Kvieks, like the different profiles they give at different temps. Some say they are like having 3 different yeasts in the same package.

I’m gonna have to find out

Why an all in one system?

One of the biggest crazes (craze, not fad.. But fads could be a post all on its own…) right now are the all in one brewing systems. The GrainFather, Mash and Boil, Robobrew, Anvil Foundry… Seems everyone is putting some version of an electric system.

What they consist of is an 8ish gallon, 110v (some are starting to include 240) boil kettle, with a removable metal basket that you mash in. You do the mashing and boiling in the same vessel. So essentially, a stainless version of a Brew in a Bag. Each system comes with standard temp settings/controls, while each variety has its different features. From built in pumps, distilling addons and chillers depending on how you plan on using it, and of course,, how much you wanna spend.

Now I was very skeptical of these things when they first came out. But watching the Brits brew with their similar electric water boilers interested me enough to give one a try. I chose the Mash and Boil because I was only planning on using it to heat my mash waters and boil the wort in. I was going to continue to mash in my tun.

This plan works fantastic. With the timer I can have my water heated up and ready to go the minute I walk down stairs, Drain into my tun, and start heating sparge waters. But doing it this way does require a separate kettle to hold the wort while sparging before getting returned to the kettle to boil. Having all of the equipment any way,, this was fine with me.

However, I started to use the M&B for mashing as well. After figuring out that a mash bag in the tube helps drain and wrapping the entire thing in reflectix keeps heat in, and not to trust the onboard thermometer and manually check temps, I found that this system is very accurate, and very repeatable and quite easy to use especially in a small space.

Mash tube with bag

I think the basic system is pretty solid. You do need an extra kettle if you plan on sparging, possibly not if you are going no sparge. A chiller. Immersion is great, counterflows work as well. The pumps are optional, I do not use them. 

Normal brewing practices still apply here. You still need to pay attention. Make sure of your temps, sparging gives better efficiency, recirculating gets clearer wort. 

If these were around when I started decades ago, I might have started with one of these systems. I doubt that its cheaper than the burner/mashtun start up route, but if you are limited to electric brewing or have a small brew space, or just don’t wanna build your own equipment then these systems are for you.  

I for one am definitely buying another if the one I have now craps out. 

Cream Ale

Cream ale has always been one of those those beers that seems to get misunderstood. People like it because its a good, lighter, middle ground of a beer. And then again.. people hate it just because its a light, middle ground beer.

I have always been one who loves this style. Its nothing fancy, nothing extreme. Just beer. 4-5%. Light colored, and just enough hops to know they’re in there. Its was a hidden step up from the bud and miller lights of the time. 

I say hidden, because you told people you were drinking Cream Ale and that sounds great! They think you are all fancy by getting away from the old adjunct, corn and rice lager swill that old men drink. But, you either didn’t tell them, or didn’t know that this fantastic tasting Cream Ale was in fact an old adjunct corn and rice… ale.

And yes. The new wave of beer drinkers loved cream ales. People discovered the liked flavorful beers. Hops. Malt. Its all good!  

Then the snobs came. And I’m not exactly sure when in this game it happened. But suddenly craft beer became afraid of using corn or rice. Like it made them seem less legit or something. The Cream Ale didn’t just fall off the craft beer map, it was generally shunned and avoided

But The homebrewers (who at this stage were generally less snobby then they seem to be now), kept cranking them out for a couple of reasons.  

  • Its a straightforward easy going style that homebrewers can understand and it doesn’t over power even newcomers to craft beer. 
  • Its on the lower end of cost. Small grain bill and low hopping keeps it affordable 
  • Because it is a neutral flavored beer, Its often a good pick to add things to and experiment with..

As with all things beer, the circle is coming back around again and these Cream Ales are finding popularity again. Todays version is still very simple and cost effective to keep one on tap at all times. 

Try this one. I’ve made many variants of this basic formula and they all have been great.

  • 8 lbs of a 2 row.. American, British, Pilsner… All of one kind or a mix of them
  • 1 to 1.5 lbs of an adjunct. flaked corn or flaked rice, wheat or a mix of them. A bit more or less or how ever you want.
  • Hops. An Ounce of cascade, cluster, or Liberty, or Goldings or Saaz… at 60 min, then maybe another ¼ ounce at 15. Almost any hop works. Stay around 20 IBU with a smidge at 15min and your good.
  • Any yeast works here. A clean American yeast like California Ale yeast and its a Cream Ale, Use a British yeast like US-04 and its a Golden ale. Lager yeast,, then its an American Lager,  German yeast you start getting into Kolsch territory… 
  • Mash around 152 to keep some body

Simple but great beer with lots of playroom. Go brew one again.