Favorites: UK style hop


I think all of us brewers have a favorite ingredient to use. A hop that you just love to use, or that goto yeast that you grab every time.

For favorite grain and yeast, my picks are pretty clear,, but I’m gonna save those for a  later post. Today it’s the hops that I wanna look at.

But I can’t seem to narrow it down to one overall favorite hop. So I’m gonna cheat and do three hops. One for each region of beers I like best. An American Hop, a German hop, and what I’m going to use today, a British hop.

My pick for favorite British/UK style hop has got to be the Golding, or more specific, East Kent Golding to sound more snooty. The difference between the two really is negligible, and that gap widens and contracts each season or weather event.

UK Goldings are a big player in the UK beer styles. Much more in the late editions than say,,, Fuggles. Goldings have that earthy, noble hop characteristic that most people associate with the British style beers. I wouldn’t say pungent,, but there is something very faint like that going on. And they have a more rounded, or softer feel, in the bittering perception as compared with hops of similar Alpha acids.

I would say from my experience with them is that the Golding hop is a bit more pronounced in the earthyness and sometimes floral than your Fuggles, which can lean towards a citrusy note if used later in the boil.
Those two flavor points play good together and thats why you see them used together so much, and could be why Fuggles is sometimes described as dirt, when it’s infact probably the Goldings that’s it’s often pared with.

The US variety on the other hand starts moving the profile slightly. Fruitier and scant traces of citrus start showing up more than the earthy tones. Side by side with the UK versions, they are different animals, almost like the before mentioned mix of Goldings and Fuggles.

As far as the numbers go, your looking at a average 4-5% alpha 3ish% beta. So not a super bittering hop, and staying close to the  “noble ish” ratio.

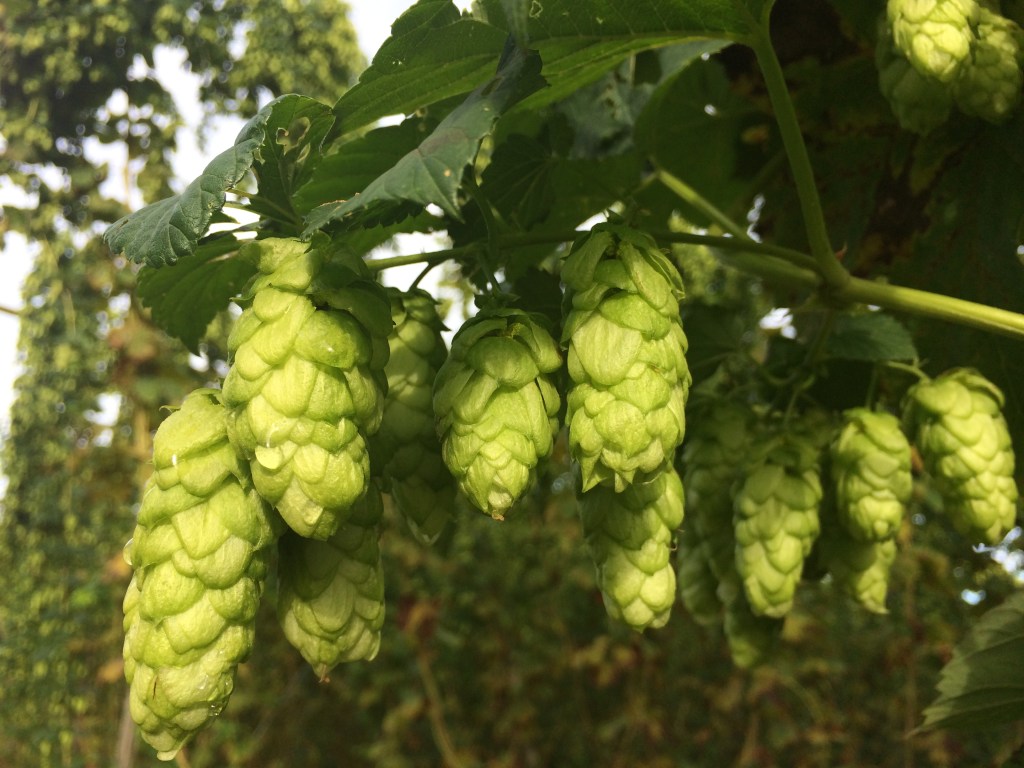
I know a few brewers that grow them here in NE wisconsin and they have had widely varying luck. Some can get bushels of cones and 50 foot vines, while the next guy with roots taken from the same plants a few miles away can barely get them to grow.

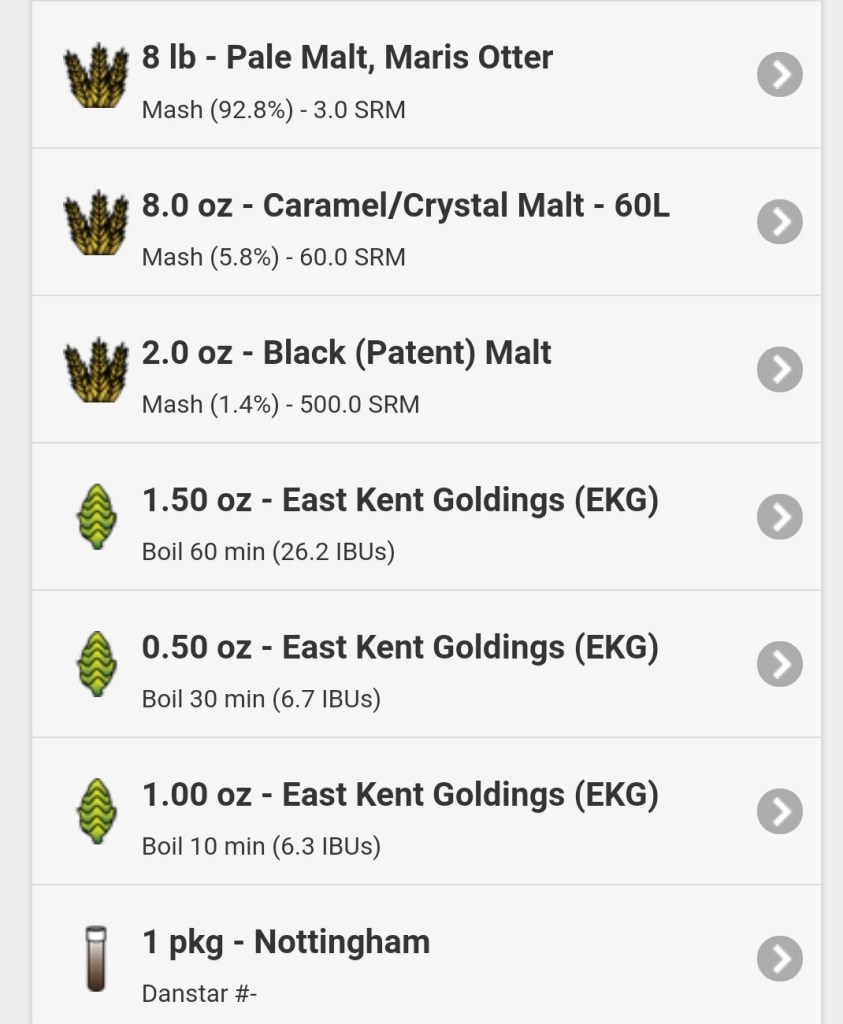
It’s really a standout taste and aroma profile. So give the a shot.  Here is a proven 9stripe recipe to get ya going.

5 gallon Special Bitter. Mash at 152F

My Kviek Uses

Seems like out of nowhere Kviek yeast blasted onto the radar of homebrewers and now craftbrewers. Its the Norwegian Farmhouse yeast that has crazy temperature tolerances.


Brewers were claiming it to be producing clean ales and even “lagers” at temps reaching into the 90sF or even higher! And being done in as little as two days.

Sounds almost too good to be true. But the reports kept coming. So I finally gave it a few tries. My garage would be the perfect place to let it rip at 90 degrees. 

The best way to test new ingredients is of course to keep them as simple as possible, so a SmaSh beer (Single Malt and Single Hop) fits perfectly. I went with Munich malt, Magnum hops, and Hornindal Kviek.
This was August. Middle of summer. My garage, and everything else is in the 90s now. I get the beer brewed and the liquid Kviek pitched. Just have to wait for the “explosion” that’s supposed to happen.

Fizzle… Nadda. First day there was nothing. You could just see the yeast clump laying on the bottom of the carboy. Just as I had figured this was gonna work. I’ll just let it sit just to make sure. 

Day two was a completely different story. Nearly up and out of the 6.5 gallon carboy, and churning so hard the bench was rumbling. And then by day 3 it was nearly completely stopped. Day 4 everything dropped and halfway done clearing. Well,, as clear as Kviek gets. (More on that shortly)

Tasting notes from the first batch were just as people said it would be. Fruity and bright. No off flavors like you would expect from high temp ferment. But murky. Like a mud bomb went off in the carboy. And that yeast taste hung around in the keg for quite a while. But when it finally dropped it was very clean tasting. But never quite clear.

The second batch was Voss Kviek. Again a SmaSh, Munich, saaz, Voss. Again in the 90s
Pretty much right down the same stages as the Hornindal. A day of lag, then a day of violent ferment, then everything falls out and starts to clear by day 3. 

Same results. Fruity, but a different fruity this time. More like fruit salad, but bright. And again muddy looking. And still yeasty tasting until the keg drops clear.. or clearer. It don’t really become clear. Not as hazy as a New England, but close.

One thing to note is that this yeast makes a ton of sludge. There must be two inches of yeast at the bottom. And seeing that, I wanted to try and save some. And I did what I read the farmers did to save this yeast. Dry it.


I grabbed a spruce branch right off the tree and swabbed it in the yeast cake and hung it in the garage. At 90F and a ceiling fan, it dried very quickly.

The next batch I made the beer as normal, and just took this stick of dried yeast, which you can see is pretty small. Like 3 inches or so. And chucked in into the wort. 

This time we had activity going much sooner than pitching the liquid. But it did the same crazy ferment and drop as the other had.
Still dirty. But I’d say not as bad. But still it never really clears in the keg. Same tastes same aromas. 

Come to find out that alot of people are getting better ferments by really under pitching. Using ¼ packet. Seems to help with the lag and esters.

And drying the cake is really popular for saving this yeast. Spread it in a pan, let it dry, break into pieces, freeze till needed, then just pitch a few dry hunks.

This yeast has some good qualities to it for sure. Some might not like that its never clear, I don’t mind. And there are more and more varieties out almost weekly. 
There are many experiments that need to be done with these Kvieks, like the different profiles they give at different temps. Some say they are like having 3 different yeasts in the same package.

I’m gonna have to find out

Why an all in one system?

One of the biggest crazes (craze, not fad.. But fads could be a post all on its own…) right now are the all in one brewing systems. The GrainFather, Mash and Boil, Robobrew, Anvil Foundry… Seems everyone is putting some version of an electric system.

What they consist of is an 8ish gallon, 110v (some are starting to include 240) boil kettle, with a removable metal basket that you mash in. You do the mashing and boiling in the same vessel. So essentially, a stainless version of a Brew in a Bag. Each system comes with standard temp settings/controls, while each variety has its different features. From built in pumps, distilling addons and chillers depending on how you plan on using it, and of course,, how much you wanna spend.

Now I was very skeptical of these things when they first came out. But watching the Brits brew with their similar electric water boilers interested me enough to give one a try. I chose the Mash and Boil because I was only planning on using it to heat my mash waters and boil the wort in. I was going to continue to mash in my tun.

This plan works fantastic. With the timer I can have my water heated up and ready to go the minute I walk down stairs, Drain into my tun, and start heating sparge waters. But doing it this way does require a separate kettle to hold the wort while sparging before getting returned to the kettle to boil. Having all of the equipment any way,, this was fine with me.

However, I started to use the M&B for mashing as well. After figuring out that a mash bag in the tube helps drain and wrapping the entire thing in reflectix keeps heat in, and not to trust the onboard thermometer and manually check temps, I found that this system is very accurate, and very repeatable and quite easy to use especially in a small space.

Mash tube with bag

I think the basic system is pretty solid. You do need an extra kettle if you plan on sparging, possibly not if you are going no sparge. A chiller. Immersion is great, counterflows work as well. The pumps are optional, I do not use them. 

Normal brewing practices still apply here. You still need to pay attention. Make sure of your temps, sparging gives better efficiency, recirculating gets clearer wort. 

If these were around when I started decades ago, I might have started with one of these systems. I doubt that its cheaper than the burner/mashtun start up route, but if you are limited to electric brewing or have a small brew space, or just don’t wanna build your own equipment then these systems are for you.  

I for one am definitely buying another if the one I have now craps out.